 By Owen Palmer
Updated November 2026
Rustic garden decor is one of the most forgiving styles you can build yourself. With reclaimed wood, a few tools, and some patience, you can create planters, signs, lanterns, and garden art that look weathered and settled from the day they go outside. This guide walks through eight practical diy rustic garden decor ideas, explains how to plan them so they suit your space, and covers the finishing and placement details that make homemade pieces look intentional rather than improvised.
Start With a Plan for Your Rustic Garden Style
Rustic design leans on texture, natural materials, and a sense of age. Before you cut anything, decide which version of rustic you want. A farmhouse yard might use galvanized metal, weathered barn wood, and mason jars. A woodland look favors bark, stone, twig trellises, and moss. A coastal rustic style pairs driftwood and rope with sun-bleached paint. Choosing one palette keeps your projects cohesive. If you want a broader overview of styling options, the article Ideas for Garden Decor: 12 Designer Ideas to Style Any Yard covers how to pull a yard together around a single theme.
Shopping for one? See our guide: 6 Best Decor for Garden Tub Ideas to Brighten Your Yard (2026).
Map where each piece will go
Walk your yard with a notebook and mark sight lines. Most rustic pieces work best as focal points at the end of a path, beside a bench, or anchoring a corner bed. Note the sun and shade pattern across the day, because wood and paint respond differently to direct light. A rough sketch with dimensions helps you avoid building a 36-inch planter for a space that only fits 20 inches.
Tools and Materials You Will Need
Most of these projects use the same basic kit. Gather these before you start:
- Reclaimed or untreated lumber, such as 1×6 or 2×6 pine or cedar
- Cordless drill and driver bits, including a countersink bit
- Exterior-grade wood screws, 1-1/4 to 2 inches long
- Circular saw or miter saw, or a hand saw if you are working with small offcuts
- Tape measure, speed square, and pencil
- Orbital sander with 80- and 120-grit paper
- Exterior wood stain or a milk paint, plus brushes and rags
- Waterproof sealer appropriate for outdoor use
- Safety glasses, hearing protection, and a dust mask when sanding
Cedar and redwood resist rot better than pine, but pine is widely available and takes stain well when sealed properly. Avoid pressure-treated lumber for planters that will hold edible plants, and check the label on any reclaimed wood for old paint or chemical treatments.
Eight DIY Rustic Garden Decor Projects
1. Reclaimed Wood Planter Box
A simple box planter is the easiest entry point. Cut four side panels from 1×6 boards, each 12 inches long, and a bottom from two boards laid edge to edge. Screw the sides to the bottom with two screws per joint. Leave small gaps of about 1/4 inch between bottom boards so water drains. Drill four drainage holes in the base and set the planter on small feet or bricks to keep it off wet soil. Distressing with a wire brush before staining gives it an aged look quickly.
2. Hand-Painted Wood Garden Sign
Cut a 1×8 or 1×10 board to your desired length, sand the face, and sketch your lettering in pencil. Use a stencil or a template printed at the right size for crisp letters. Paint with exterior enamel or a matte outdoor paint in a muted color. Once dry, rub the edges with sandpaper and dab a little dark stain over the paint to simulate weathering. Seal the whole sign with two coats of exterior varnish. Mount it on two short posts or hang it from a chain.
3. Tin Can and Mason Jar Lanterns
Clean and dry several food cans, fill them with water, and freeze them overnight. The ice keeps the metal from crumpling when you punch holes. Use a nail and hammer to make a pattern of holes around the sides, then tap out any burrs. Add a short tea light or a solar puck inside. For jars, fit a wire handle through a metal lid, or wrap a jar with a sisal band. Group three or four at different heights on a stump or along a step.
4. Log or Stump Plant Stand
A sawn section of log about 12 to 18 inches tall makes a strong plant stand for a single pot or a small succulent arrangement. Look for a dry, sound log with no soft rot. Sand the top flat, then seal the cut face with a penetrating exterior sealer. Place it on gravel for drainage. This project works well in woodland gardens where it can gather a little moss over time.
5. Rustic Trellis From Branches
Gather straight, dry branches about 1 to 1-1/2 inches in diameter. Lay them in a grid or a diamond pattern on the ground, then lash the crossings with jute twine or galvanized wire. Pre-drill small holes at each joint if the branches are dry and brittle. Set two posts in the ground about 24 inches deep and attach the trellis to them. It suits climbing beans, sweet peas, or clematis.
6. Repurposed Ladder Display
An old wooden ladder leaned against a fence or wall can hold trailing plants, small pots, and hanging baskets on each rung. Anchor the top with a bracket or set the base into a shallow trench for stability. Keep the ladder away from high-traffic areas, and check rungs for cracks before loading them. Paint or leave the wood natural depending on your palette.
7. Wine Bottle Edging
Inverted bottles pushed neck-down into soil create a glinting border along a path. Dig a trench about 3 inches deep, insert bottles at 4-inch spacing, and tamp soil firmly around each one. This works best in a sunny spot where light can pass through colored glass. It is a low-cost way to add repetition and color to a bed.
8. Wooden Wheelbarrow Planter
An old metal wheelbarrow filled with soil and trailing annuals reads as rustic and deliberate. Drill a few drainage holes in the tub and line it with landscape fabric before adding potting mix. Plant mounding flowers such as geraniums or trailing lobelia. Move it seasonally if you need the space back for other uses.
Finishing and Weatherproofing
Wood that sits outside needs protection. Sand all surfaces to at least 120 grit, remove dust, and apply a penetrating stain or sealer. Two thin coats usually perform better than one thick coat. Manufacturers typically specify a recoat interval of one to three years depending on exposure, so check the label on your product. For painted pieces, a primer designed for exterior wood helps the topcoat adhere and resist peeling.
Placement and Styling Tips
Rustic pieces look best when they feel like they belong in the landscape. Set planters on level ground and stabilize them with gravel. Group items in odd numbers, such as three lanterns or a trio of planters at varying heights. Let moss, lichen, and climbing plants soften the edges over time. For ideas on mixing handmade pieces with other garden elements, DIY Garden Art Ideas offers more inspiration for turning simple materials into focal points.
Lighting your rustic pieces
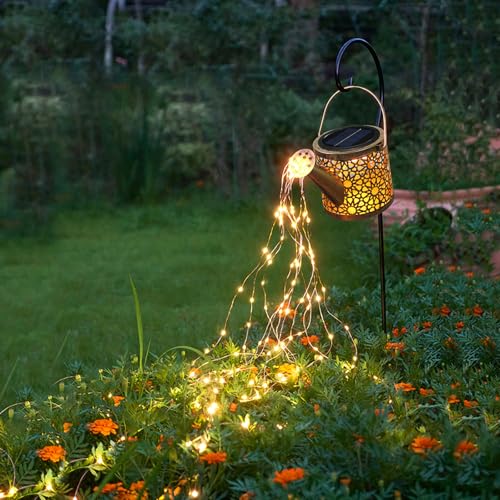
Solar lanterns and tea lights add warmth after dusk. Place them where they can catch the last of the day’s sun, and keep them out of deep shade. If you want a more permanent glow, Solar Lighted Garden Decor: A Designer's Guide to Placement and Style explains how to position solar fixtures so they highlight texture without glare.
Common Mistakes
- Using untreated pine directly in soil, which rots quickly. Raise planters on feet and line the interior with landscape fabric.
- Skipping sealer on the end grain, where water enters fastest.
- Overcrowding a small bed with too many pieces. Choose one or two focal items per area.
- Choosing a finish that looks too new. Lightly distressing or staining gives an aged, settled appearance.
- Placing wood on bare soil without a gravel base, which holds moisture against the bottom boards.
- Ignoring the mature size of climbing plants on a trellis, which can overwhelm thin supports.
Recommended gear
A few supplies make these projects faster and cleaner to finish:
- Exterior wood stain: Penetrating stains soak into the grain and resist peeling, making them a good fit for planters and fences. View on Amazon
- Orbital sander: Speeds up surface prep on reclaimed boards and smooths edges before sealing. View on Amazon
- Countersink drill bit set: Creates a flush screw head so boards sit flat and do not split. View on Amazon
- Jute garden twine: Natural fiber that ties trellis joints and holds climbing stems without harsh edges. View on Amazon
FAQ
What is the easiest diy rustic garden decor idea for a beginner?
A reclaimed wood planter box or a painted wood sign is usually the simplest starting point. Both need only a few straight cuts, basic screws, and a sealer. Once you are comfortable with those, try a trellis or stump stand.
Which wood is best for outdoor rustic projects?
Cedar and redwood resist decay naturally and suit planters and signs well. Pine is affordable and widely available, but it needs a good exterior sealer. Avoid pressure-treated wood for anything that will touch edible plants.
How long do handmade wood garden pieces last?
Lifespan depends on wood species, exposure, and maintenance. Sealed cedar pieces can last several years, while untreated pine may break down within a season or two in damp soil. Reapplying sealer every one to three years, as manufacturers typically recommend, extends life considerably.
Can I use reclaimed wood safely in a vegetable garden?
Be cautious. Older wood may contain old paint, lead-based coatings, or chemical treatments. If you plan to grow food, use untreated lumber from a known source or line raised beds with a food-safe barrier. Consult a local extension office if you are unsure about a specific material.
How do I keep metal lanterns from rusting?
Choose galvanized or powder-coated steel where possible, and seal any bare metal with a rust-inhibiting spray. Keep them off wet soil and bring them under cover during heavy rain or winter if you can.
What finish looks most rustic on outdoor wood?
Gray-toned or weathered stains, matte milk paint, and lightly distressed natural wood all read as rustic. Avoid high-gloss finishes, which look more modern and show wear faster outdoors.
Do I need permits for garden structures like trellises or fences?
Requirements vary by municipality and by the height and placement of the structure. Check with your local building department before installing anything tall or near a property line.
How do I attach heavy decor to a fence or wall safely?
Use exterior-rated fasteners and anchors suited to the surface, whether wood, masonry, or vinyl. Test the load before hanging anything heavy, and consult a qualified professional for large or structural installations.
Conclusion
Diy rustic garden decor rewards simple planning and honest materials. Start with one or two projects that fit your space, finish them with a quality sealer, and place them where they can settle into the landscape. Over time, weather and plants will do much of the styling for you.
Related reading
Ready to choose one?
About Owen Palmer
Owen Palmer is part of our editorial team and reviews and edits our garden design & decor guides, checking product details against manufacturer specifications and owner feedback.