 By Graham Fisher
Updated November 2026
Garden treasures fountain instructions boil down to a handful of steps: choose a level site, assemble the basin and tiers, fill it with clean water, plug in the pump and tune the flow. Done in the right order, the whole process takes most people an afternoon, and the result is a fountain that runs quietly and stays put through wind and rain. This guide walks through each stage the way a designer would approach a client’s yard, with checklists and placement tips along the way.
Before You Start: Gather Tools and Check the Box
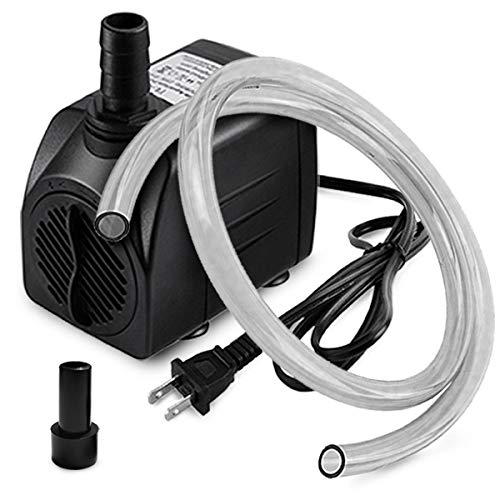
Lay out every part before you touch the pump. Garden fountains from this family of mass-market outdoor fountains usually ship with a basin, one or more tiers or bowls, a submersible pump, a length of vinyl tubing, a spray head or nozzle, and sometimes a small stand or mounting post. Matching pieces to the packing list first saves you from discovering a missing part with the basin already full of water.
Shopping for one? See our guide: 6 Best Solar Fountains for the Garden Picks for Every Yard (2026).
Gather these supplies before you begin:
- A spirit level, ideally 12 inches or longer
- A flat-blade screwdriver and any hardware included with the kit
- A bucket and garden hose for filling
- Scissors or a utility knife for trimming tubing
- A flat shovel and a small piece of landscape fabric or sand for the base, if you are setting the fountain into soil
- A GFCI-protected outdoor outlet or a weatherproof extension cord rated for outdoor use
- A soft cloth for wiping the basin
Read the manufacturer’s manual for model-specific torque, pump wattage and maximum water height. Those numbers vary by model, and the manual is the authority for your unit.
Step 1: Choose and Prepare the Site
Placement decides how much maintenance your fountain will need. Pick a spot that is level, stable and reachable by a power source. Keep it at least a few feet from walkways so splash does not soak passersby, and avoid placing it directly under trees where falling leaves and seeds will clog the pump.
Check for Level Ground
Set your spirit level on the flat area where the basin will sit, then check it in two directions. A fountain that sits even a fraction out of level will spill unevenly and the water will pool on one side. If the ground slopes, dig out the high side or add a compacted layer of sand or crushed stone until the surface reads level.
Plan Your Power Source
Most pumps in this category run on standard 120-volt household current. Use a GFCI-protected outlet, and keep the cord run as short as possible. If you need an extension, use one rated for outdoor use and keep all connections off the ground and out of standing water. For a yard without an outlet nearby, a solar-powered model may be a better fit; see our guide to Garden Fountain Solar Power: 5 Best Picks for Every Yard (2026) for options.
Step 2: Assemble the Basin and Tiers
Start with the largest, heaviest piece and work upward. Set the base or lower basin in its final location before adding anything else, because a tiered fountain full of water is far harder to move.
- Place the bottom basin on the prepared, level surface.
- Position the center column or pedestal if your model uses one, and tighten it firmly by hand.
- Stack each upper tier in order, aligning the notches or pins that hold them in place.
- Check the level again after each tier goes on. Small shifts add up.
- Tighten any retaining screws or collars only until snug. Over-tightening can crack resin or thin plastic.
Mount the Pump Correctly
Place the submersible pump in the lowest basin or reservoir, typically on a flat surface or on the small pump stand included with the kit. Keep the intake clear of the basin floor so it does not pull in sediment. Route the tubing up through the center column or along the outside, depending on your design, and keep it free of sharp kinks.
Step 3: Fill the Fountain Correctly
Fill the basin with clean water before you power on the pump. Running a submersible pump dry can damage the motor, so the water level must cover the pump inlet at all times. Most manuals call for filling to a level just above the pump housing, then topping off after the water settles through the tiers.
Use a hose and let the water run gently into the basin rather than pouring from a bucket onto the tiers, which can knock pieces out of alignment. Fill slowly and watch for tilt as the weight shifts.
Step 4: Connect Power and Tune the Flow
Plug the pump into the GFCI outlet or extension cord, then switch on the fountain. Watch the spray for the first minute. A healthy spray should rise smoothly and fall back into the basin without splashing outside the rim.
Adjust the Spray Height
Most kits include a flow control valve or a spray head that can be rotated. Turn it slowly and observe the arc. If water spills over the edges, reduce the flow. If the spray is too weak to reach the upper tier, check that the tubing is not kinked and that the pump intake is clear.
| Symptom | Likely cause | Fix |
|---|---|---|
| Spray is weak | Kinked tubing or low water level | Straighten tubing and top off water |
| Water splashes outside basin | Flow set too high | Reduce flow valve setting |
| Fountain tilts or sits unevenly | Uneven base | Power off, empty, re-level and refill |
| Pump hums but no water | Air in line or low water | Top off water and check tubing connections |
| Pump stops suddenly | Debris at intake or tripped GFCI | Unplug, clean intake, reset outlet |
Step 5: Set Up Lighting and Finishing Touches
Once the fountain runs reliably, add any decorative elements. If you plan to add lighting, choose fixtures rated for submersion or for outdoor damp locations, and position them so the cords stay out of the water path. Our walkthrough on Garden Fountain Set Up: A Step-by-Step Guide for Beginners (2026) covers how to handle the basics of cord routing and placement in more detail.
Consider planting around the base to soften the edges. Low groundcovers and grasses help hide the basin rim and visually anchor the fountain to the landscape. Keep planting a few inches back so roots and foliage do not block the pump or spill debris into the water.
Routine Care
A little maintenance keeps the pump quiet and the water clear. Top off the basin weekly during hot weather, since evaporation can drop the level faster than you expect. Clean the pump intake and the spray head every few weeks, and empty and scrub the basin once or twice a season. In colder regions, drain the fountain and store the pump indoors before freezing temperatures arrive. For winter-specific advice, see Top 5 Winter Fountain Grow a Garden Options for Cold-Season Yards.
Common Mistakes
- Skipping the level check. A few degrees of tilt causes uneven spray and water loss over the rim.
- Running the pump dry. Always confirm the water covers the pump before switching on.
- Using a standard cord outdoors. Use outdoor-rated cord and a GFCI-protected outlet.
- Over-tightening tier hardware. Snug is enough; cracking a resin tier is a costly repair.
- Placing the fountain under trees. Leaves and debris will clog the intake within weeks.
- Filling with dirty water. Sediment wears the pump and stains the basin. Start with clean water and empty it periodically.
Tips for a Better-Looking Fountain
- Set the fountain where it can be seen from a window or seating area, so you actually enjoy the sound.
- Use a mulch or gravel border to keep soil from splashing into the basin.
- Match the scale of the fountain to the space: a tall tiered piece looks lost in a small bed, while a low basin disappears against a large lawn.
- Keep one replacement pump gasket or spare tubing on hand, since small parts are the most common reason for a fountain going quiet.
Recommended gear
A few supplies make the job easier and the result more durable. Start with a reliable outdoor power source, since that is the one part you cannot improvise.
- Outdoor GFCI extension cord. A weatherproof cord with built-in ground-fault protection keeps the pump safe in damp conditions. View on Amazon
- Spirit level, 12-inch. A longer level makes it easier to verify the basin is flat across its full diameter. View on Amazon
- Replacement fountain pump. Keeping a spare submersible pump matched to your model prevents a long wait if the original fails. View on Amazon
- Landscape fabric. A layer under gravel or sand helps keep the base stable and discourages weeds around the basin. View on Amazon
FAQ
How long does it take to set up a garden treasures fountain?
Most people finish a standard tiered or basin fountain in two to four hours, including site prep, assembly and the first fill. Larger multi-tier pieces or sites that need digging take longer.
Can I leave the pump running all day?
Many owners run their fountains during daylight hours and switch them off overnight. Check your manual for continuous-run guidance, and make sure the water level is maintained.
Why does my fountain make a rattling noise?
Rattling usually means a loose tier, a pump that is vibrating against the basin floor, or a pump intake pulling in gravel. Re-level the fountain, reposition the pump on a flat surface, and check for debris.
How often should I clean the pump?
Clean the intake screen every few weeks during the active season, or whenever the spray weakens. Heavy debris loads, such as near trees, may call for more frequent cleaning.
Can I use tap water?
Tap water works for most setups, but mineral deposits can build up on the basin and pump over time. Empty and rinse the fountain periodically, and wipe off any white residue.
Do I need to winterize my fountain?
In regions with freezing temperatures, yes. Drain the basin, remove the pump, and store both indoors. Frozen water can crack resin and ceramic pieces.
Is it safe to run electrical cords near water?
Use only outdoor-rated cords and GFCI-protected outlets, keep connections elevated and dry, and never reach into the water while the pump is plugged in. If you are unsure about your wiring, consult a licensed electrician.
Conclusion
Following these garden treasures fountain instructions in order, from site prep through final tuning, gives you a stable, quiet water feature. Check the level, keep the pump submerged, and clean the intake regularly, and your fountain should run well for many seasons. Once it is set, take time to watch the water and adjust the spray until it suits the space.
Related reading
- Smith and Hawken Garden Fountain Instructions: Step-by-Step Setup
- Garden Treasures Slate Rock Fountain: A Step-by-Step Setup and Placement Guide
- Garden Treasures Resin Tiered Fountain: Setup, Placement and Care Guide
Ready to choose one?
About Graham Fisher
Graham Fisher is part of our editorial team and reviews and edits our garden design & decor guides, checking product details against manufacturer specifications and owner feedback.