 By Weston Fitzgerald
Decor stones for garden spaces do more than fill gaps between plants. Used well, they add texture, anchor a planting bed, guide the eye along a path, and bring a sense of permanence to a design that might otherwise feel loose. This guide walks through how to select the right stones, decide where they belong, arrange them with a designer’s eye, and avoid the mistakes that make stone decor look like an afterthought. By the end, you will have a clear plan you can sketch on graph paper and install over a weekend.
Why Stone Works So Well in Garden Design
Stone is one of the few garden materials that looks equally at home in a cottage border, a Japanese-inspired courtyard, or a sleek modern bed. Its color and surface do the visual work, so you rarely need to add much else. Stone also holds its shape through seasons, which means the composition you design in spring still looks intentional in late November when the perennials have died back.
Think of decor stones for garden use as a design layer rather than filler. Each stone should have a reason to be there: to repeat a color from the house, to echo a curve in a path, or to hold a visual corner where two beds meet. When every stone has a job, the result looks curated instead of scattered.
Step 1: Define the Role Your Stones Will Play
Before buying anything, decide what the stones should do. Most decor stone projects fall into one of four roles, and each calls for different sizes and placement.
- Accent stones: One or two large, distinctive pieces that become a focal point, often placed at an entry or at the end of a sightline.
- Mulch replacement: Small, rounded stones spread across a bed to suppress weeds, retain moisture, and create a uniform ground plane.
- Edging and boundaries: Flat or upright stones that define the shape of a bed or separate one zone from another.
- Textural filler: Mixed-size stones tucked among plants to create contrast in color and surface.
Choosing a role first keeps you from buying a pile of pretty stones that never find a home.
Step 2: Choose Stone Type, Size, and Color
Stone type affects both looks and performance. River rock is smooth and rounded, which suits naturalistic and Japanese-inspired designs. Crushed or angular stone, such as decomposed granite or lava rock, reads more contemporary and interlocks better on slopes. Flagstone and slate offer flat surfaces for paths and stepping features. Pebbles from a landscape supplier are often a practical choice when you need a large volume.
Size matters as much as type. As a general guide for mulch-style stone, use pieces roughly 3/4 inch to 2 inches across in small beds and slightly larger in open areas, so they do not wash away in heavy rain or get lost among foliage. For accent stones, scale them to the planting. A boulder that looks right beside a 4-foot shrub may overwhelm a 6-inch perennial.
For color, limit yourself to two or three families. Warm grays, buff tones, and charcoal are safe with almost any house color. Blue-gray slate pairs well with silver foliage, while rusty or terra cotta stone complements Mediterranean plantings. Avoid high-contrast speckles across the whole bed unless you want the stones to compete with the flowers.
Stone Selection at a Glance
| Stone type | Typical look | Best use | Typical size range |
|---|---|---|---|
| River rock | Smooth, rounded, natural | Dry creek beds, Japanese-style gardens, mulch | 3/4 in to 3 in |
| Crushed angular stone | Sharp, contemporary | Modern beds, gravel paths, slopes | 3/8 in to 1 in |
| Flagstone or slate | Flat, layered | Stepping paths, patios, edging | Varies by slab |
| Boulders | Solid, sculptural | Focal points, retaining features | Typically 1 ft and up |
Step 3: Plan the Layout on Paper
A simple sketch prevents most placement problems. Measure your bed, mark existing features like trees, downspouts, and hose bibs, and draw the bed to scale. Then decide where your accent stones will sit first, since they set the composition. Fill in mulch stone and edging after that.
When placing a large stone, bury about one-third of it in the soil. This makes it look like it grew there rather than being dropped. Angle the stone so its most interesting face is visible from the main viewing point, usually the path or patio.
Arranging Stones in Groups
Odd numbers look more natural than even ones. Place three stones of descending size in a loose triangle, with the largest at the back or to one side. Keep the spacing uneven. Stones set exactly apart look like a grid, which reads as manufactured. For a dry creek effect, follow a gentle S-curve and vary the width of the stone band from narrow to wide.
Integrating Stones with Plants
Let plants overlap the edges of stone areas so the transition feels soft. Ornamental grasses and low, mounding perennials work particularly well against stone because they soften hard edges. Keep tall plants on the north or east side of a bed so they do not shade smaller companions.
Step 4: Install for Longevity
Good installation prevents weeds, erosion, and stone migration. Start by clearing the area and removing perennial weeds by their roots. Lay a landscape fabric or a heavy-duty weed barrier, cutting it in X-shapes around plant stems. Overlap seams by several inches. Spread stone to a consistent depth, usually 2 to 3 inches for mulch-style coverage, and rake it level.
On slopes or near downspouts, add a stone border or a shallow trench edge to keep material from washing downhill. Compacted base layers help flat paths stay level, and a thin bed of sand or fine gravel under flagstone keeps slabs from rocking.
Step 5: Style the Finished Space
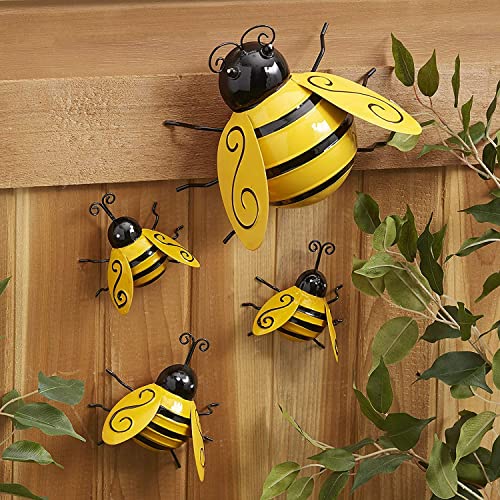
Once the stones are in place, layer in complementary elements. A single weathered container, a bench, or a piece of garden wall art can complete a corner. Solar or low-voltage path lights tucked beside accent stones add nighttime interest. Repeat one color or shape elsewhere in the garden so the stone area feels connected to the rest of the yard.
If you are building a full theme, pair stone with other materials. A Japanese-inspired bed might combine raked gravel, a stone lantern, and clipped evergreens. A cottage border might use rounded river rock as a edging band beneath billowing perennials.
Common Mistakes
- Using too many stone types. Two textures usually look intentional; four often look cluttered.
- Skipping the weed barrier. Stones will sink into soil and weeds will push through within a season.
- Choosing stones that are too small for the space. Tiny pebbles in a large open area can look like sand and scatter in wind or rain.
- Setting every stone at the same height. Vary depth and angle so the arrangement looks natural.
- Ignoring drainage. Stone can trap water against foundations or create runoff problems if the grade is wrong.
- Overbuilding small beds. In a compact garden, one strong accent is often better than many small stones.
Tips for a Polished Result
- Wet a sample of each stone type before buying in bulk, since color changes dramatically when damp.
- Order slightly more stone than your calculation, and keep a few extras for future repairs.
- Step back from the bed every few minutes during installation to check the composition from the main viewpoint.
- Rinse stones before placing them to remove dust that can make them look chalky.
- Combine stone with plants that have different leaf textures, such as fine-leaved grasses and broad hostas, for richer contrast.
Recommended Gear
A few supplies make stone projects much easier to complete cleanly.
- Heavy-duty landscape fabric: A woven or thick non-woven fabric blocks weeds better than thin plastic sheeting and lets water pass through. View on Amazon
- Landscape rake: A wide, sturdy rake spreads and levels stone more evenly than a standard garden rake. View on Amazon
- Edging stakes or steel landscape edging: These hold stone in place along bed borders and help prevent migration. View on Amazon
- Garden knee pads: Placing and leveling stone involves a lot of kneeling, and padded support makes long sessions more comfortable. View on Amazon
FAQ
What size decor stones work best for garden beds?
For mulch-style coverage, stones between 3/4 inch and 2 inches work well in most beds. Larger accent stones can be scaled to the surrounding plants.
Do I need landscape fabric under decor stones?
In most cases, yes. A weed barrier prevents weeds from growing up through the stone and keeps stones from sinking into the soil over time. Some designers skip it under dry creek beds with heavy base layers, but that is the exception.
How deep should I spread stone mulch?
A depth of about 2 to 3 inches is common. Thinner layers allow weeds and soil to show through, while much deeper layers can make it harder for plant roots to receive water.
Can I mix stone types in one garden?
Yes, but limit yourself to two or three types so the design stays cohesive. Pick a dominant stone and use others as accents.
Which stone colors work with most houses?
Warm grays, buff tones, and charcoal tend to suit a wide range of exterior colors. Choose stone that picks up a secondary color from your siding or trim for a more tailored look.
Will decor stones attract pests or heat up in summer?
Stone can hold heat, especially dark stone in full sun, so keep it away from tender plants near south-facing walls. Pests are generally not attracted to stone itself, but moist stone over damp soil can encourage slugs in some climates.
How do I keep stones from washing away?
Use edging to contain the material, install a weed barrier, and avoid placing loose stone at the base of steep slopes without retaining features. Replace migrating stones as needed during the first season.
Conclusion
Decor stones for garden design work best when each piece has a clear role, a limited color palette, and a considered position. Start with a sketch, choose stone sizes that match your planting scale, and install with a proper base to keep everything in place. With those steps, stone becomes a lasting structure that supports every other element in your garden.
Related reading
- Painted Garden Decor
- Stone Garden Sculptures
- Best Garden Stepping Stones
- Wind Chimes for the Garden
- Using Texture in Garden Design
- Upcycled Garden Decorations

About Weston Fitzgerald
Weston writes about garden design & decor. Each guide starts with research into how products are built and what owners report after months of use, and is revised when better options appear.